How to Create a White Paper Origami Christmas Tree in Photoshop
This tutorial will show step by step how to create an original paper origami christmas tree in Photoshop that you can use either or a christmas card or in your designs.
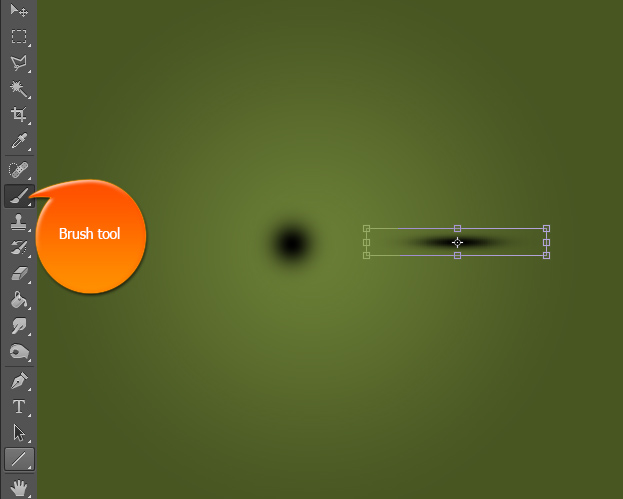
01. Start with opening a new document with average to high height and fill your backround color anything but white so that the white paper would show nicely. Now create a new layer in the menu Layer > New > Layer, select the brush tool, color black and make a small dot. Go to Edit > Transform > Scale and transform the dot into a flat dot. Press enter. This will be the shadow of your tree.
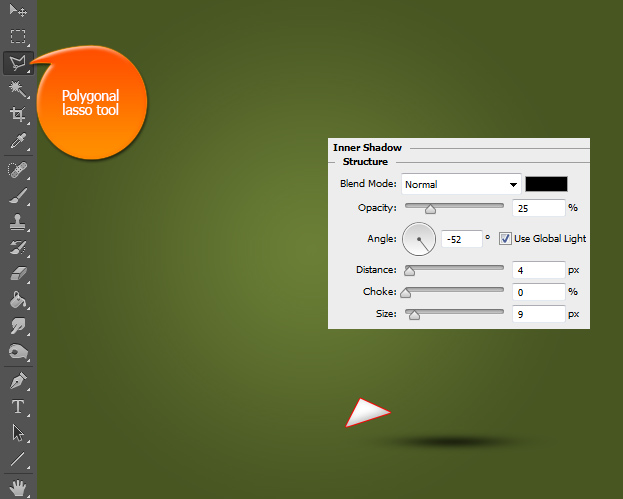
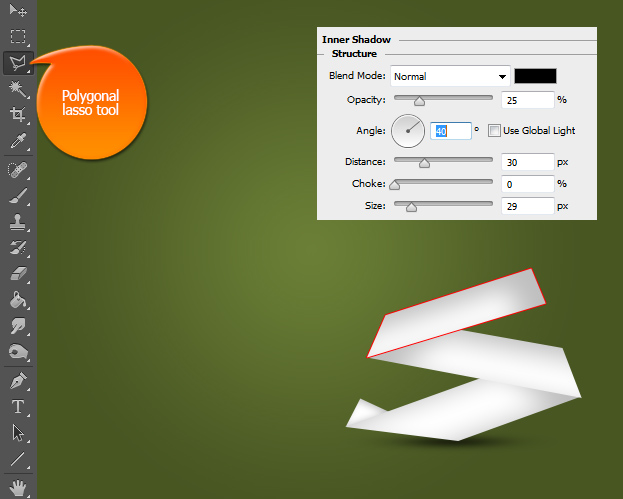
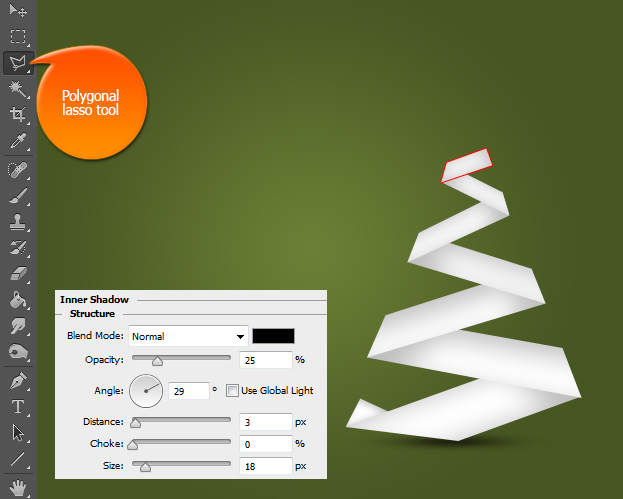
02. Move the shadow at the bottom of the background where you will place the bottom of your tree. Now the hardest part will start – creating the paper shapes. This will be a series of making new layers, shapes and adding shadows. Start out by creating a new layer – Layer > New > Layer, select the polygonal lasso tool and create your first shape that is a little bit turned triangle. Fill it with color white and then go to Layer > Layer style > Inner Shadow. There set a slight shadow with the setting below. Press Ok.
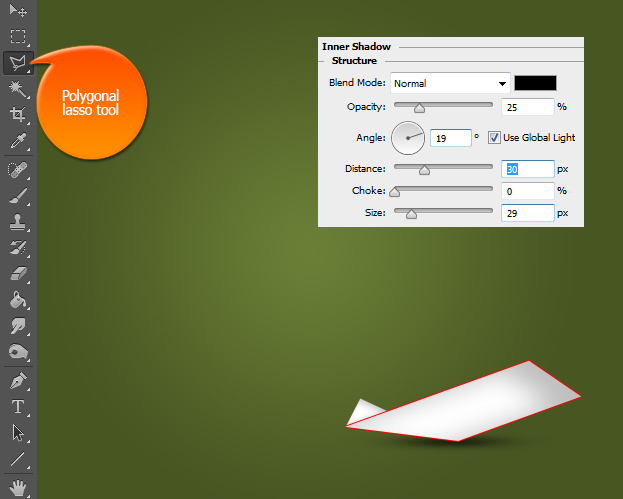
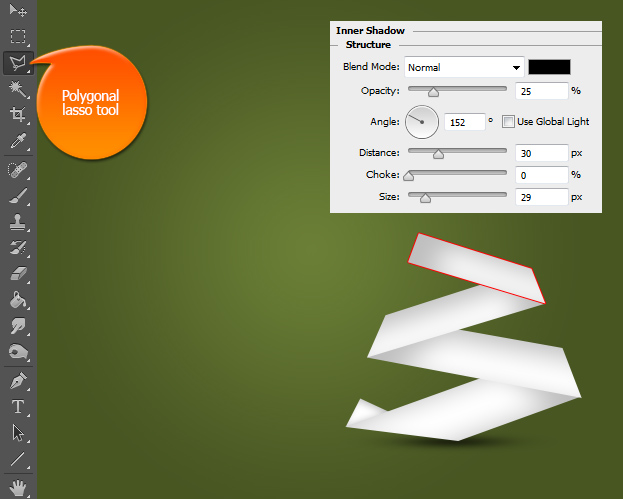
03. Create a new layer, take polygonal lasso tool, make a selection of a shape shown below, go to Layer > Layer Style > Inner Shadow and add a shadow on the right side of the shape. Press Ok.
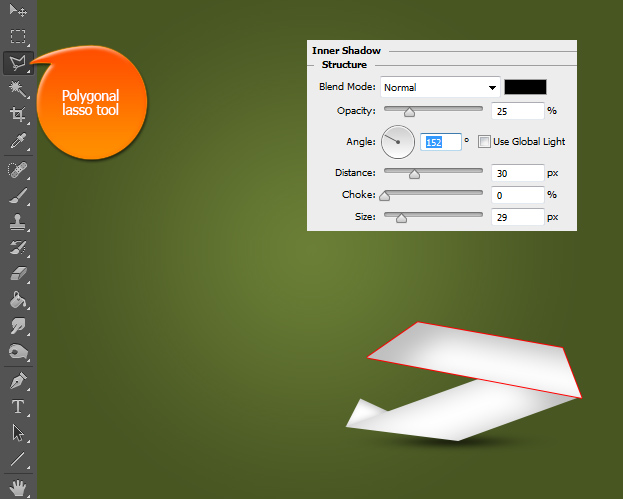
04. Create a new layer, take polygonal lasso tool, make a selection of a shape shown below, make sure the shape is a bit less in width than the lower shape, go to Layer > Layer Style > Inner Shadow and add a shadow on the left side of the shape. Press Ok.
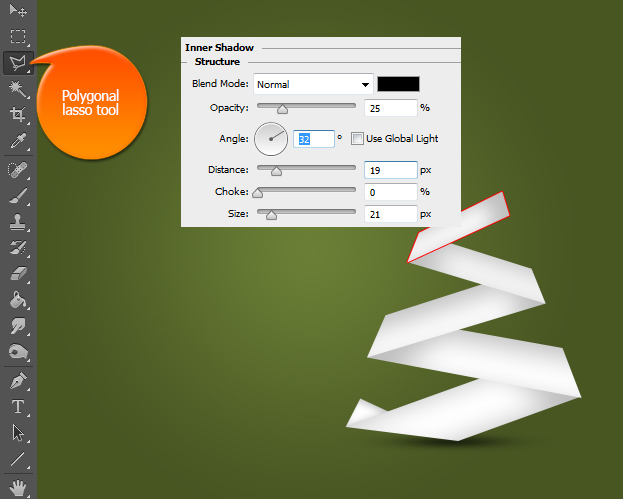
05. Create a new layer, take polygonal lasso tool, make a selection of a shape shown below, make sure the shape is a bit less in width than the lower shape, go to Layer > Layer Style > Inner Shadow and add a shadow on the right side of the shape. Press Ok.
06. Create a new layer, take polygonal lasso tool, make a selection of a shape shown below, make sure the shape is a bit less in width than the lower shape, go to Layer > Layer Style > Inner Shadow and add a shadow on the right side of the shape. Press Ok. By now its clear that if you’d make this with real paper, you’d take a longer stripe of paper and would just create break points by zig-zagging the paper.
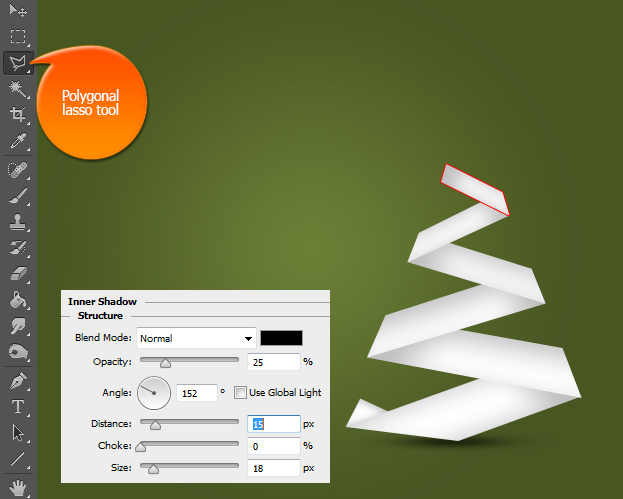
07. Repeat the regular steps of a new layer, white fill and an inner shadown on the right side. Notice that the shapes do not only go smaller in witdth but also smaller in height?
08. Create a new layer, take polygonal lasso tool, make a selection of a shape shown below, make sure the shape is a bit less in width and height than the lower shape, go to Layer > Layer Style > Inner Shadow and add a shadow on the left side of the shape. Press Ok.
09. Almost done with the tree, create another new layer, draw a shape, fill it with white and add an inner shadow on the right. Press Ok.
10. Create another new layer, draw a shape, fill it with white and add an inner shadow on the left. Press Ok.
11. Create a new layer, fill it with white and since this is the last tree part, no shadow is needed. And your tree is done!
12. To add a star at the top, 5 new steps are necessary. On each step, create a new layer, add color white, add inner shadow and press Ok.
13. Add some text if needed and your origami Christmas tree is ready to be displayed!
