Create a shiny orb in Photoshop
This tutorial will teach you how to create a nice shiny orb using Photoshop.
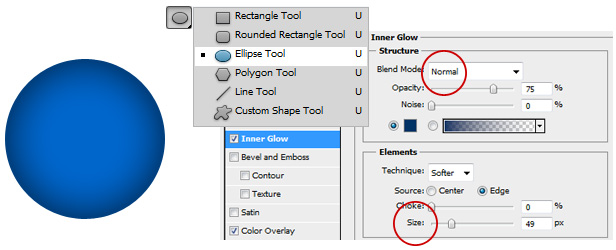
01. Firstly, create a circle by using Ellipse tool. Then select the layer you made your circle, double click on it and a Layer Style popup will open. Click on Inner Glow text and set a darker inner glow on your circle. Set the Blend Mode to normal and Size according to your orb size so it would cover about 1/3 of the edge. Press OK.

02. Now you need to create a selection over your circle. For that In the Layers window you need to Ctrl + click the picture of the layer. If you have a selection around your circle then go to Select – Modify – Contact and put there 2 px.

03. While the selection still on, create a new layer by pressing the Create a New layer button below a Layers menu or just press a shortcut Ctrl + Shift + N. Remember, the selection is still on. Now take The Gradient tool, set the main color to white and choose from the above Gradient menu the necessary color – from white to transparent. And now on that selection click on the mouse and drag it from up to down inside that selection.

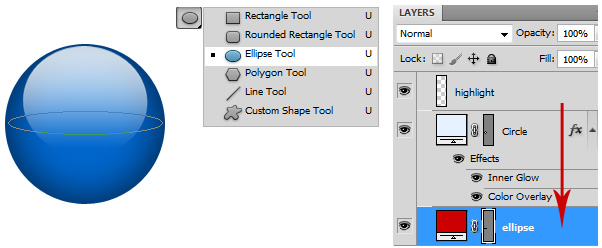
04. Now we start to work with the highlight. Select the highliht layer and go to Edit – Transform – Distort and distort the highlight like on the sample below. Simply move the lower left and right inwards and the lower middle upwards. Press Enter and move to Layers menu where you should set the opacity of the highlight to about 80%.

05. Now lets add a shadow under the orb. For that choose an Ellipse tool and draw it as wide as the orb is. Then drag the ellipse layer under the orb layer so it would be under the orb exactly in the middle.

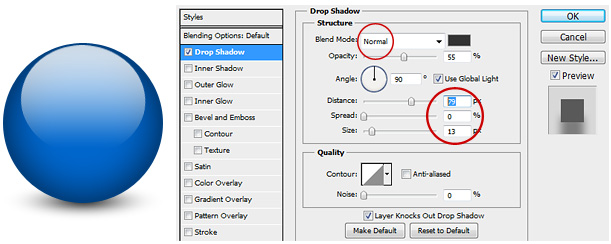
06. Now double click on the ellipse to open a Layer Style popup. From there click on a text Drop Shadow and set the Blend Mode to Normal, raise the Distance til the shadow is under the orb and set the Spread and Size til the shadow seems right.

Congratulations, you have successfully made an orb.
