How to Create a Simple Snowman in Photoshop
This tutorial will show you how to create a simple snowman in Photoshop.
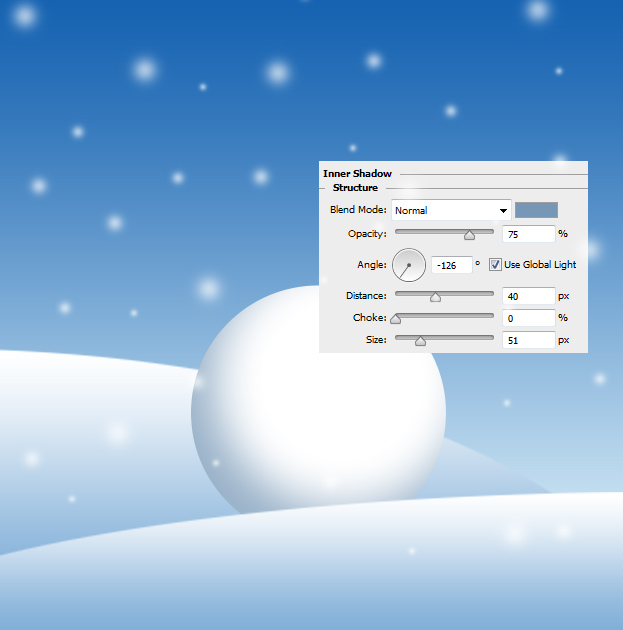
01. Open a new document and fill it with any color or picture. In this tutorial we’ll use a winter background made from shapes and gradients for the snowman to feel more like home. Now pick the Ellipse tool and create a white circle.
02. Now go to Layer > Layer Styles > Inner Shadow. A new small window will open. There just set the color to blue shade, set the angle to about -126, Distance about 40 and Size about 50. Why “about”? It all depends on the size of your circle. If it is as small/big as on the picture below, then these settings are good, if smaller, lower the distance and size value, if bigger, raise both of the values. Press Ok.
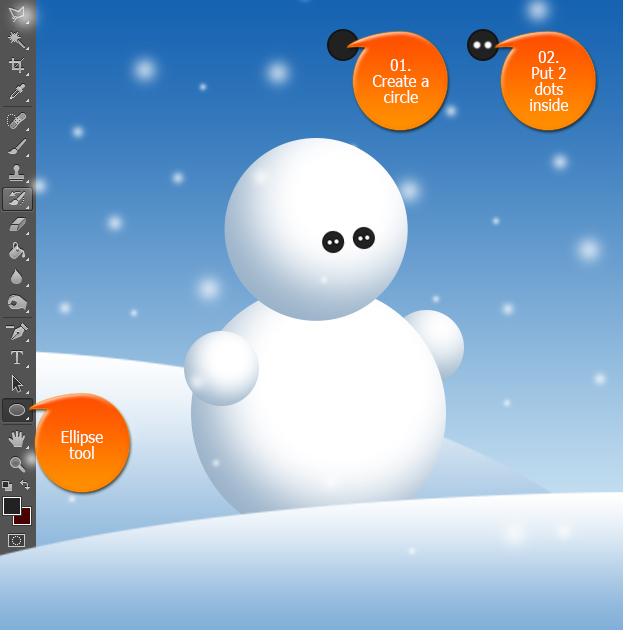
03. Make smaller circles with Ellipse tool to represent the hands. Don’t forget to set the Inner Shadow layer style to both of them.
04. Now add a head with the same settings. It’s best if the head is a bit smaller than the body is. Also, you can make more than just 2 layer snowman.
05. Time to add a pair of eyes. Lets create a button for it. Take the Ellipse tool, create a dark gray circle and add two smaller white circles on top of it. Then just set the button to its place, duplicate it and set the other.
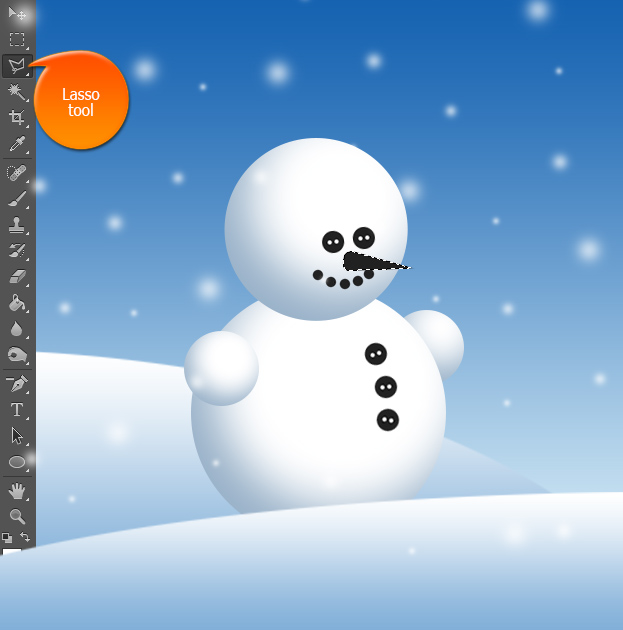
06. The same buttons you can also add as, surprise!, buttons to your snowman. Place them with a small curve.
07. Now create a small gray dots that represent stones that are put to create a smile to the snowman.
08. Create a new layer (Layer > New > Layer) and take the lasso tool. Now make a selection that reminds a carrot – a tall triangle. Fill it with any color.
09. Time to add that carrot shade to the shape. Go to Layer > Layer style > Gradient Overlay and set a gradient of dark orange to lighter orange. Press Ok.
10. And your snowman is done!


