How to Create Popular Social Icon Buttons in Photoshop
Need some same looking yet different social icons on your design? This tutorial will show you how to create different social buttons with the same design in Photoshop.
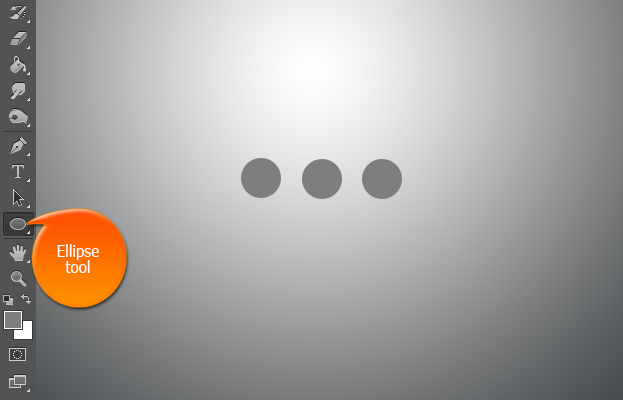
01. Take the Ellipse tool and create as many differetn circles as you need – each circle for each social icon.
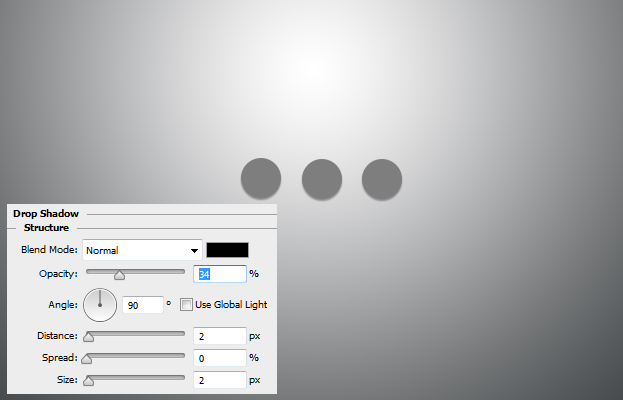
02. Now add some basic layer styles on the button by going to Layer > Layer Styles > Drop Shadow. Set the values but don’t press Ok yet.
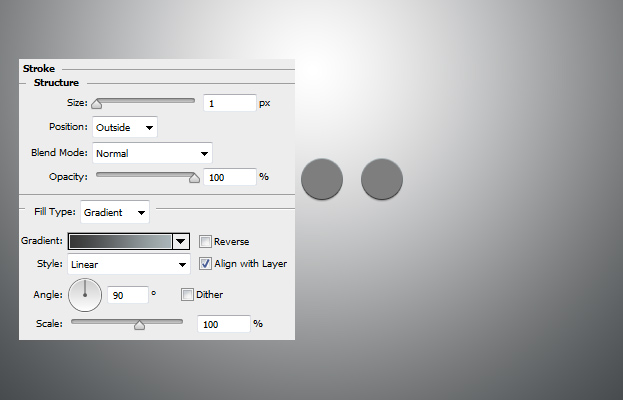
03. Move to the Stroke tab and add a gradient stroke on the button.
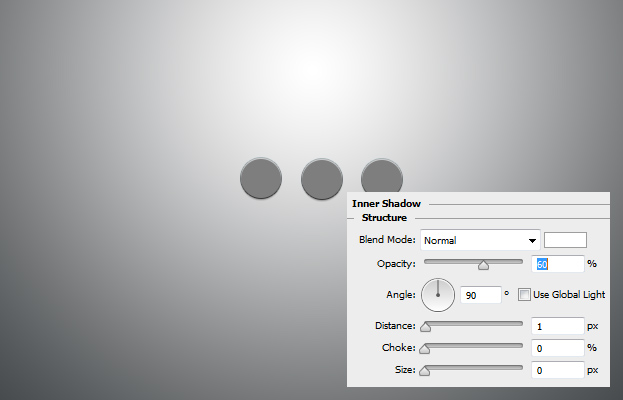
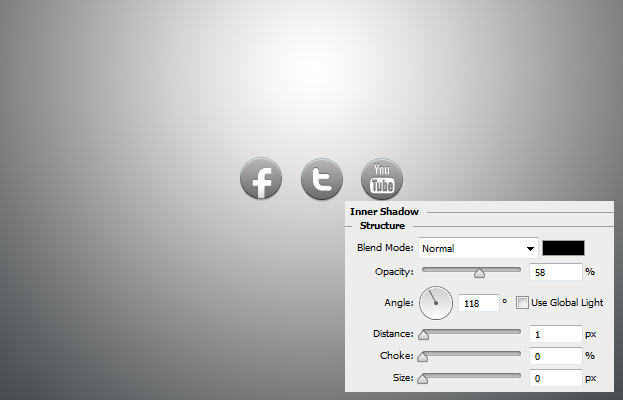
04. Move to the Inner Shadow tab and add a very small light shadow on top of the button.
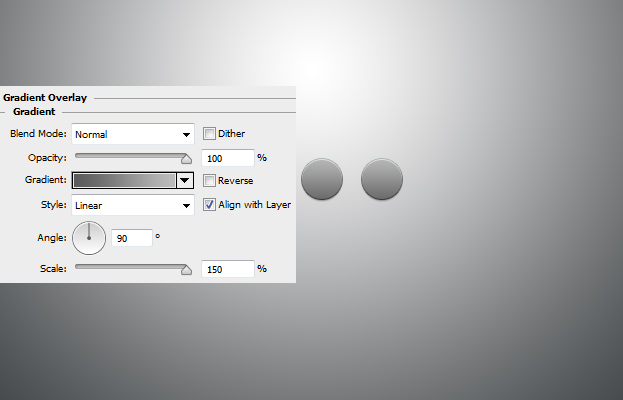
05. And the last step before the Ok button is adding some gradient on the button.
06. Now add the icons on top of the buttons. F for Facebook, T for Twitter and more complicated logos for others. These kind of popular logos are available on the Internet but be sure to get one with a a transparent background. Then go to Layer > Layer Style > Color overlay and add a white color, after that add a small Inner Shadow and press Ok.
07. And your social icon buttons are ready to be pressed. But be sure you make one with colors of your preference and style.
