Create a Colorful Loading Screen With Circular Loader in Photoshop
This tutorial will show you how to create a colorful loading screen with circular loader in Photoshop.
01. Create a new document, select the Gradient Tool, set the color from one shade to another and drag with the mouse in the direction you wish your gradient to be.

02. Now take the Custom Shape Tool, choose the shape of a circle that is empty from inside and drag your shape on your background.

03. Double click on your shape to enter Layer Styles menu. There click on Color Overlay, set the color that is about the same with your background color.

04. Then click on Drop Shadow, set the shadow color to white, angle to 90, distance to 1 and Size to 2.

05. Then go to Inner Shadow and add a small shadow by changing the distance, size and Blend mode to Overlay. Press OK.

06. Duplicate your circle by right clicking on the circl layer and choosing Duplicate layer. Then double click on your duplicate, uncheck all the boxes and enter Gradient Overlay. This time set a different shades of colors that would pop on your background.

07. Then go to Drop Shadow and add a small shadow by setting the Distance to 2 and Size to 2. Also lower the Opacity when needed.

08. Then go to Inner Shadow and add a small white shadow by setting the Distance to 1 and Size to 1.

09. Now enter the Stroke and set a Size 1 stroke with the same color as your circle is.

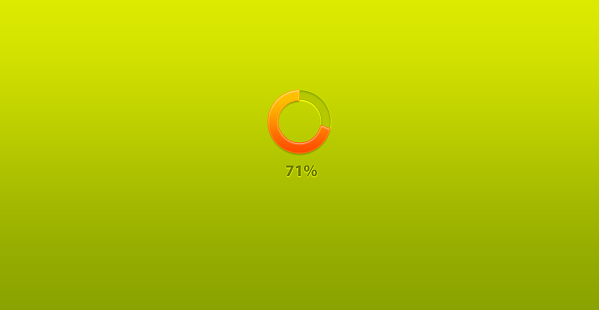
10. Right click on your orange circle layer and choose Rasterize. Then pick the Marquee Tool and select a part of the loading to delete.

11. Then take the text tool and type in how much has been loaded. Text color should be a darker shade of your background color.

12. Double click on your text and set a small white shadow by changing distance and size to 1.

And your loading screen is ready!