
How to create Attractive Icons in Photoshop
This tutorial will teach you how to create a simple and attractive icon that will suit using in any size or place.
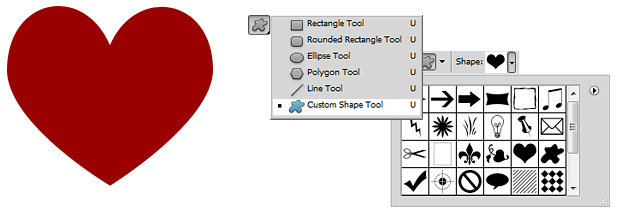
01. Firstly, create a shape – either using Custom Shape tool. I chose a heart shape, but you can choose any other.
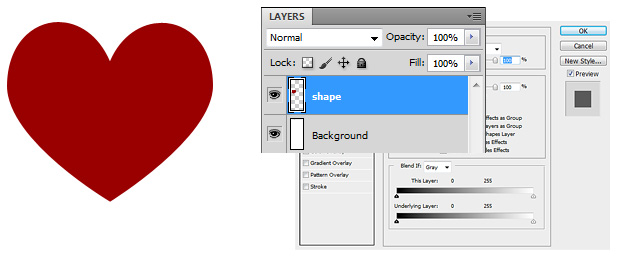
02. Secondly, lets enter the Layer styles menu to add some color and other effects to our shape. For that select the shape from your Layers box (Window – Layers if you are missing the box). Double click on the layer, so that Layer Style window would pop up.
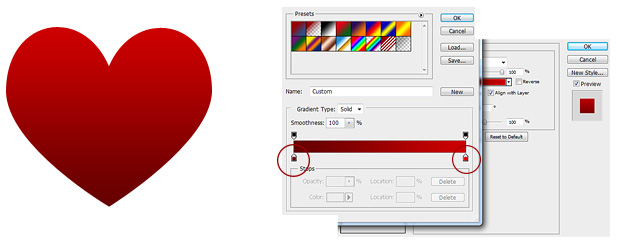
03. Layer Style window being open we can finally start working on the heart. First thing you choose from the popup is Gradient Overlay (click on the text, not just the checkbox). There we choose a linear style (should already be default) and then click on the colour. A new popup opens. There on one side choose a darker color (I have dark red 990000) and the other side choose the same color but slightly lighter (I have cc0000). Press OK and you should have something like a heart below. Don’t yet close the Layer Style window.
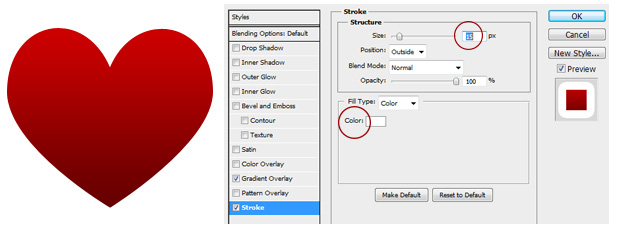
04. Next lets set a white border and a small shadow. For that go in the same popup, click on Stroke, choose stroke size (I have 15) and set color white.
05. After adding the stoke, click on Drop Shadow, put Blend Mode to Normal, set the Angle and choose the Distance, Spread and Size. When everyhting seems ok, press OK and your icon is ready for use.
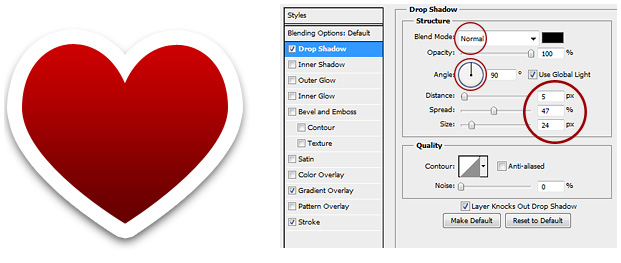
With this method you can make many different icons in any color you wish.
