How to Create a Modern Video Player Interface Design in Photoshop
This tutorial will show you how to create a video player design in Photoshop.
01. Create a new layer, color it black or darker grey. Then take the Rounded Rectangle Tool (Radius about 2-5) and draw a larger shape. Double click on the shape layer and go to Gradient overlay. There set the color from black to dark grey with an angle of 90. Then go to drop shadow and add a black shadow under the shape. Don’t close the window yet.

02. Then go to Inner shadow, change the angle to 90, color to white and distance to 2. Then go to Inner glow and again, add a small white glow inside the shape. And lastly, go to Stoke and add a regular 1px black stroke around your shape. Press OK.

03. Choose your video picture and set it in the middle of the shape so the edges would show.

04. Take the Rounded Rectangle Tool (Radius about 2-5) and draw a longer shape on the below part of your screen area. Now right click on your screen layer and choose Copy Layer Style and then right click on your new shape’s layer and choose Paste Layer style. Note they should have the same layer styles. Double click on your new shape’s layer, go to Gradient Overlay and set the Gradient to Reverse (just check or uncheck the box depending what its state is). Press OK.

05. Create a new layer (Layer – New – Layer), pick the Polygonal Lasso tool and draw a play icon shape – a triangle. Then take the Paint bucket tool and color it white.

06. Now take the Rounded Rectangle tool (Radius about 2-5), drag a long thin shape, double click on its layer and set the gradient overlay from one dark grey to another.

07. Then add a small light grey shadow in the Drop shadow and a black stroke in Stroke menu. Press OK.

08. Dublicate the new shape by right clicking on the layer and choosing Duplicate layer. Right click on your duplicate and choose Raseterize layer. Then take the marquee tool, select part of the shape and delete it. Now double click on the layer and uncheck all the boxes. Then go to Gradient Overlay and set it from one color to another. Press OK.

09. Now take the Ellipse tool, draw a circle, double click on the circle layer and set a Gradient overlay of an Angle style of 45 degrees. Press OK.

10. Now lets create some separators for other tools. Take the Line tool, draw a black line, double click on the line shape layer, go to Drop Shadow, set the angle to 180, color to white and lower the opacity. Press OK.

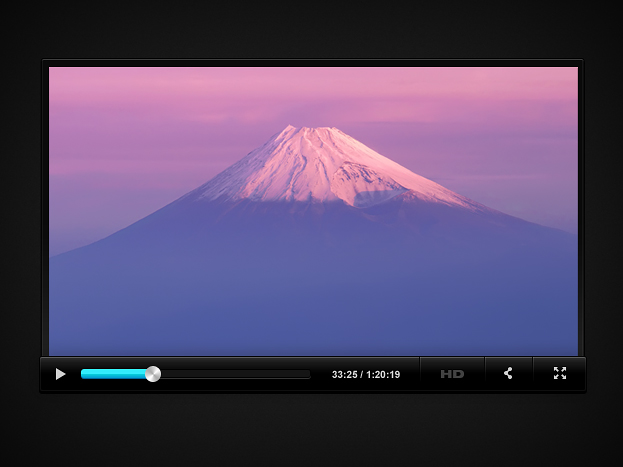
11. Take the text tool and add a time and a HD quality button text.

12. Now take the shape tool and add two more video settings icons.

And your video player interface design is ready!
