Create an Open Sign in Photoshop
This tutorial will show you how to create an open or closed sign in Photoshop.
01. First open a new document and fill it with a regular color or a gradient. For gradient, choose the gradient tool, set the color from one shade to another and drag the gradient from one direction to another on your document.

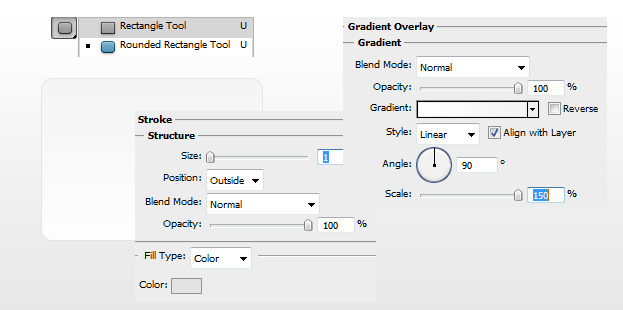
02. Now take the Rounded Rectangle tool and draw your first shape. Double click on your new layer and enter Gradient Overlay. There choose a color from one shade to another. Then go to Stroke and add a regular small 1px size stroke around your shape.

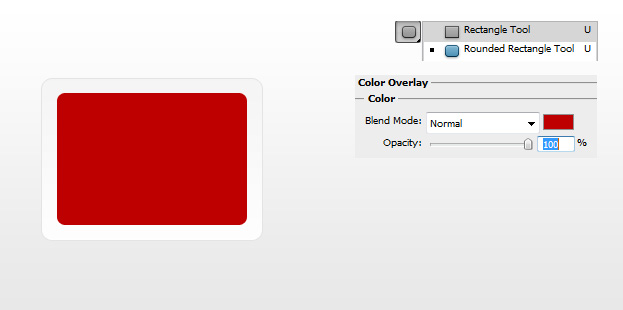
03. Select the Rectangle tool again and draw a new shape in the middle of your first shape. Double click on your new layer, enter the Color Overlay and choose the color red. Press OK.

04. Now take the Line Tool and draw 2 grey lines.

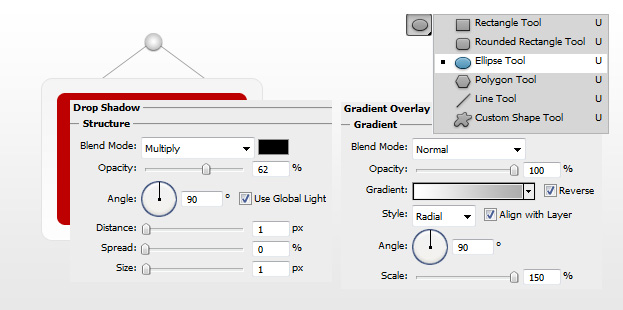
05. Now take the Ellipse tool and draw a circle. Double click on the circle layer and set a Radial gradient. Then go to Drop Shadow and add a small shadow under the circle. Press OK.

06. Now take the Type tool and enter your text.

07. Select all of your sign layers by holding Ctrl down and go to Edit – Transform – Scale and change the angle of your sign.

08. Create a new layer (Layer – New – Layer), take the brush tool, set the color to black and one click in the middle of your document.

09. Go to Edit – Transform – Scale and flatten the circle shade. And your sign is done!
